
How to Create and Sign a Document Using the eSignBase REST API
In this guide, we’ll walk through how to create and send a document signing request using the eSignBase REST API, based on an existing document template.
This guide focuses on the end-to-end workflow:
- Preparing a document template
- Authenticating with the REST API
- Creating a signing request from the template
You can find the full API reference here: https://esignbase.com/api_documentation
Document Credits & Sandbox Mode
Creating a document signing request in eSignBase normally requires a document credit. Each credit covers one complete signing workflow, including document sealing and audit trail generation.
Sandbox Mode (Free Testing)
For development and integration testing, eSignBase provides a sandbox mode that does not consume credits.
This allows you to:
- test the full REST API
- create and send signing requests
- validate end-to-end workflows and debug integrations without billing impact.
Note: Sandbox documents are not intended for legal use. They do not contain an AES signature and are only sent to the eSignBase account email address.
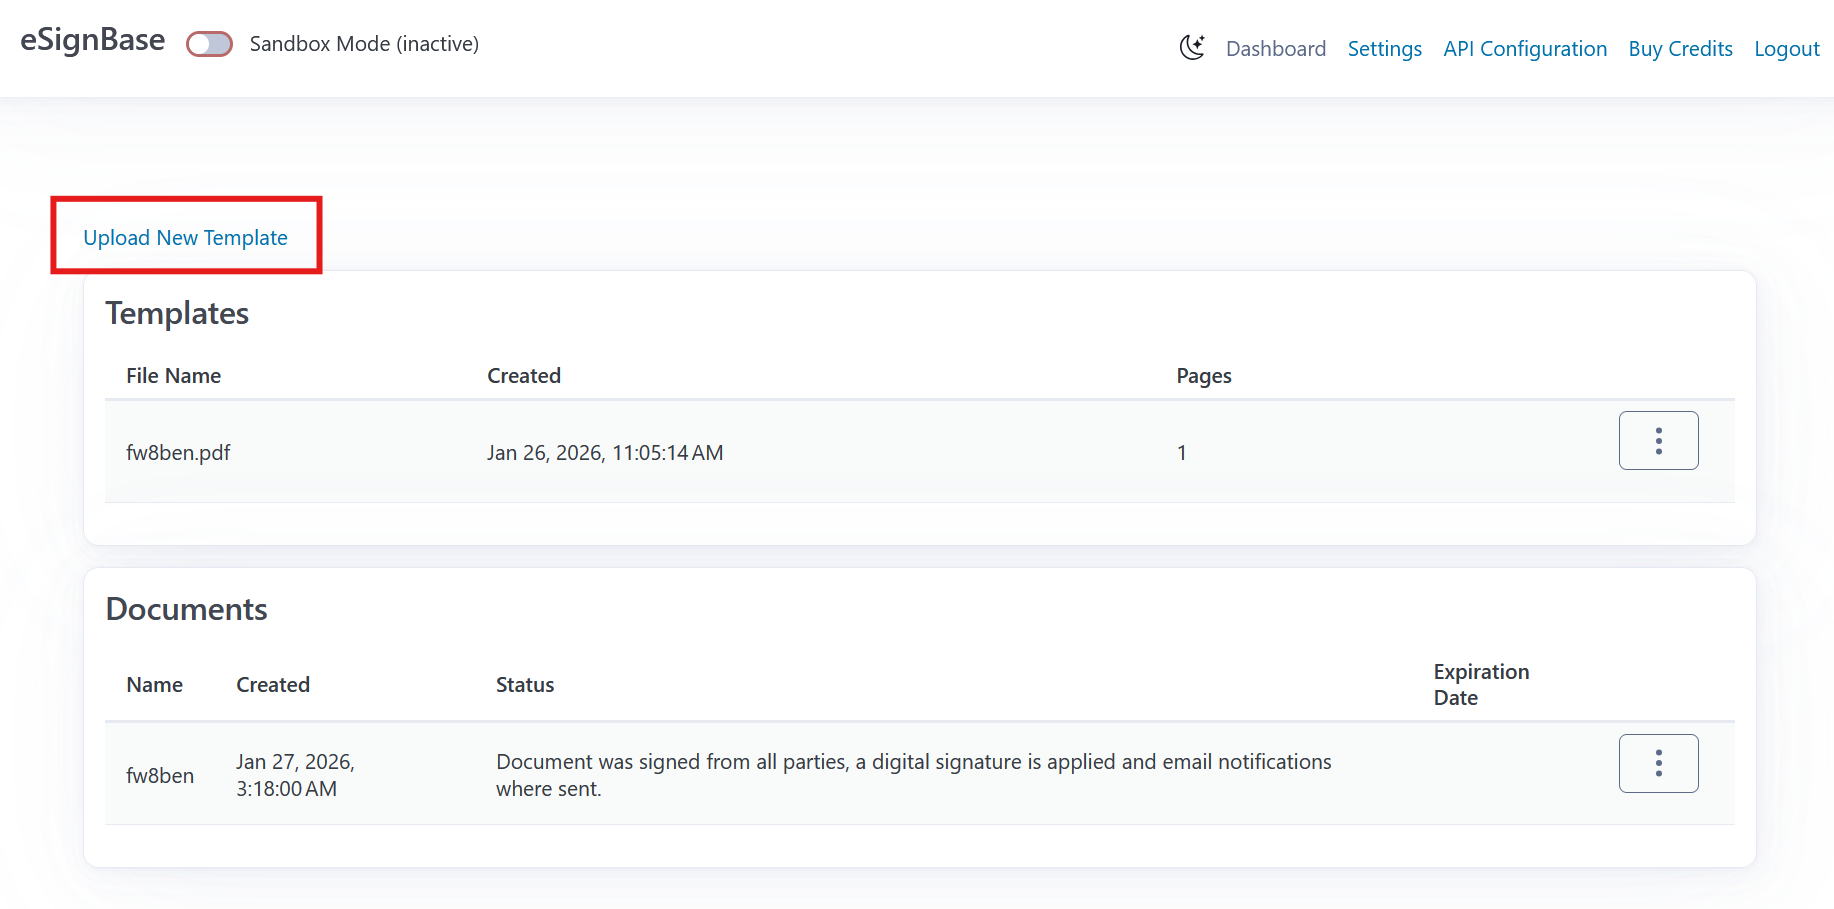
Prerequisites: Prepare a Document Template
Before you can trigger a document signing request via the REST API, a template must already exist in your eSignBase account.
Upload a PDF
Open the eSignBase web application and upload a PDF file that will serve as the template for signing requests. Pro tip: If you plan to test in Sandbox mode, ensure you switch the toggle to “Sandbox” before uploading.
Add Signature Fields
After uploading, open the template editor and add at least one Signature Field. Drag and drop the field from the form field palette onto the document. You may also add additional form fields (text fields, checkboxes, dates, etc.) depending on what information the signer should provide.
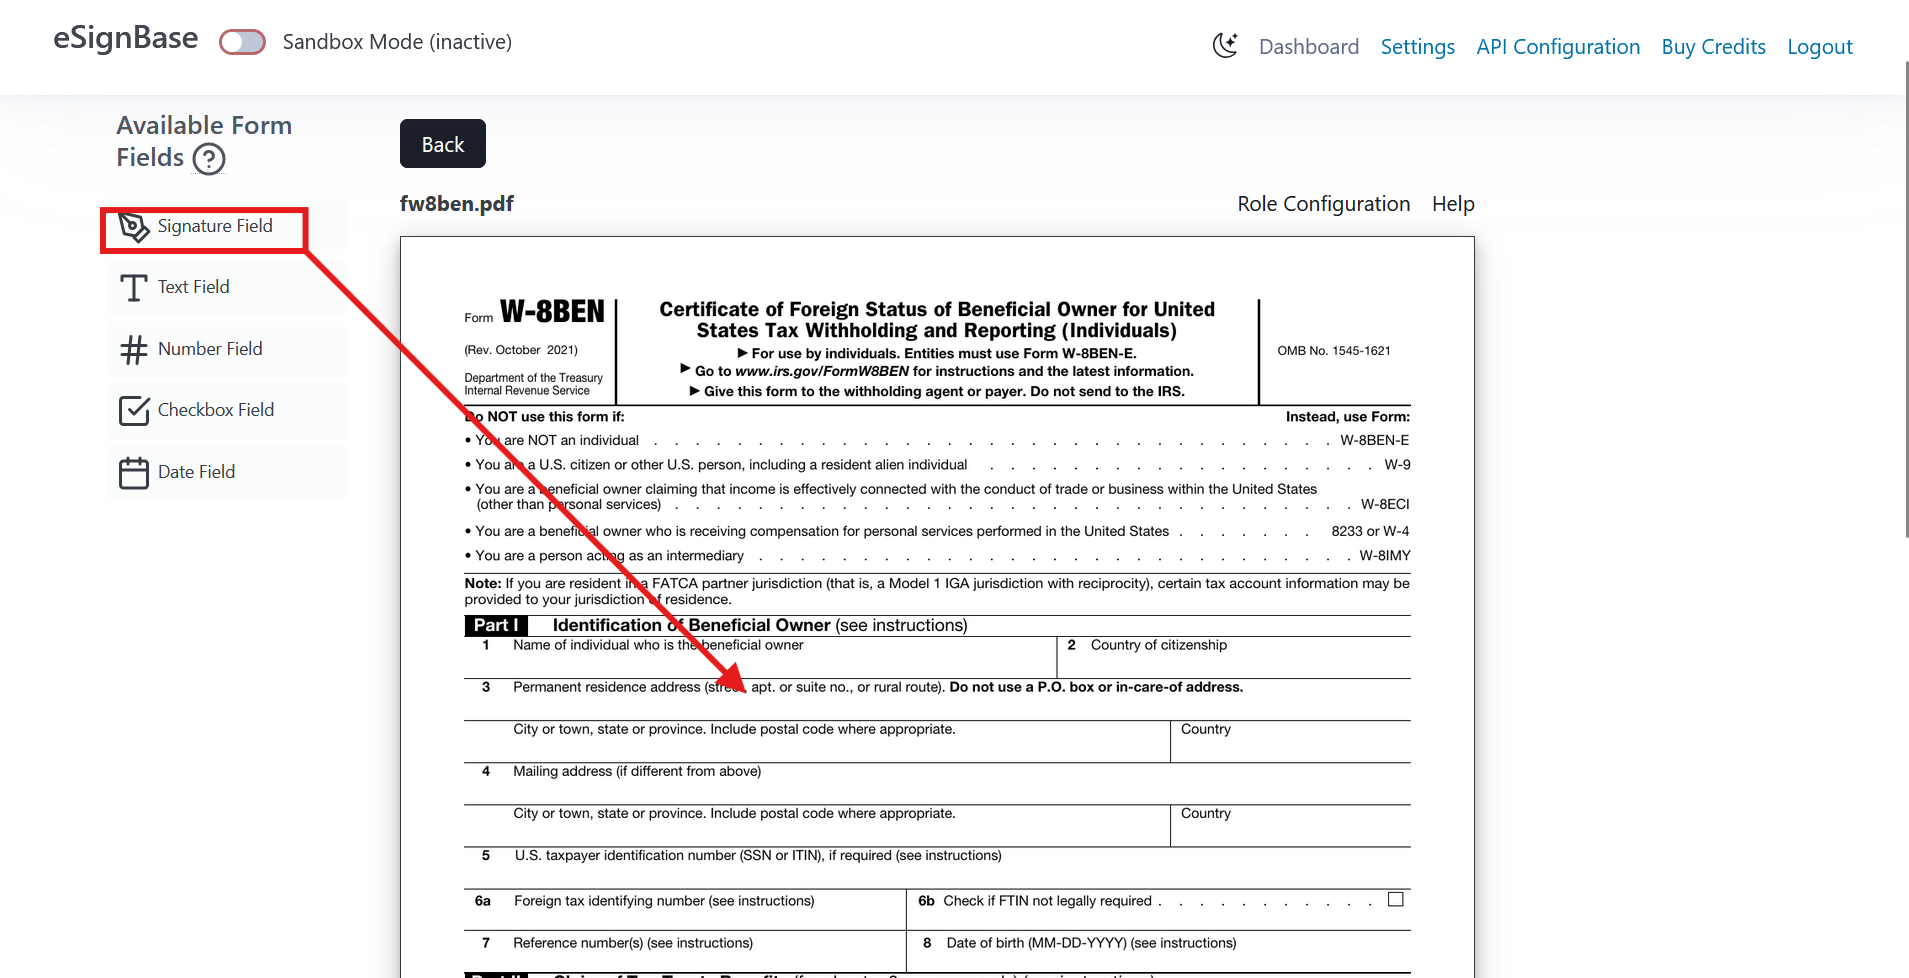
The template editor saves your changes automatically, the template can be reused for multiple signing requests via the REST API.
API Authentication
To get started, you need an OAuth Client ID and Client Secret.
- Open the API configuration page
- Create a new OAuth client
- Store the generated Client ID and Client Secret securely
These credentials are required to request an access token.
Obtaining an Access Token
To authenticate API requests, you must obtain an OAuth access token. Access tokens are time-limited and must be refreshed when they expire.
Send a POST request to: https://app.esignbase.com/oauth2/token
Required Headers
Authorization: Basic <basic_auth_credentials>
Content-Type: application/x-www-form-urlencoded
where: basic_auth_credentials = base64(client_id + ":" + client_secret)
Supported Grant Types The eSignBase API supports the following OAuth 2.0 grant types:
- client_credentials (recommended for server-to-server use)
- password (resource owner password credentials)
Example: Password Grant (curl)
The following example shows how to obtain an access token using the password grant type:
curl -X POST 'https://app.esignbase.com/oauth2/token' \
  -H 'Content-Type: application/x-www-form-urlencoded' \
  -d 'client_id=<YOUR_CLIENT_ID>' \
  -d 'client_secret=<YOUR_CLIENT_SECRET>' \
  -d 'grant_type=password' \
  -d 'scope=sandbox all' \
  -d 'username=user@example.com' \
  -d 'password=<YOUR_PASSWORD>'
Your token request must include: scope=sandbox all if you want to use the sandbox mode, other wise use scope=all
Client Credentials Grant (Passwordless)
For passwordless authentication (recommended for backend services), use: grant_type=client_credentials
In this case, the Authorization header must contain the Base64-encoded client credentials, and no user credentials are required.
Token Response
If the request is successful, the API responds with a JSON payload containing the access token:
{ "access_token": "<your_access_token>" }This access_token must be included as a Bearer token in the Authorization header of all subsequent API requests.
Creating a Document Signing Request from a Template
Once you have a valid OAuth 2.0 access token and a template prepared (with at least one signature field), you can create a new document signing request via the eSignBase REST API. This operation takes the existing template, assigns recipients to the required roles defined in that template, and initiates a signing workflow.
Understanding the Template
Templates in eSignBase may include one or more form roles (defined in the web UI). Each form role (like “signer_1”) must be matched by a corresponding recipient object in your request.
You can list all templates to find the one you want to use:
GET /api/templates
Authorization: Bearer <your_access_token>
The response includes fields such as id, filename, and form_role_names. You will use the template’s id in the next step.
Make the Create Document Request
To create a new document based on an existing template and start the signing process, send a POST request to the /api/document endpoint with the appropriate JSON body:
POST /api/document
Authorization: Bearer <your_access_token>
Content-Type: application/json
Example Request Body
Below is an example payload that:
- references the template ID
- assigns a single recipient to the required role
- optionally includes metadata and expiration settings
{
  "name": "Employee Contract",
  "template_id": "your_template_id_here",
  "recipients": [
    {
      "email": "signer@example.com",
      "first_name": "Jane",
      "last_name": "Doe",
      "role_name": "signer_1",
      "locale": "en"
    }
  ],
  "user_defined_metadata": {
    "internal_id": "42",
    "purpose": "contract-signing-test"
  },
  "expiration_date": "2026-03-15T23:59:00+00:00"
}
Field highlights:
- name — a label for the document signing request. This name will be also used in the mail send to the signer
- template_id — the UUID of the template you prepared earlier
- recipients — an array of signer definitions matching the template’s form_role_names.
- user_defined_metadata — (optional) key/value data for your internal tracking
- expiration_date — (optional) when the request should expire
Example with curl
Here’s a full example using curl:
curl -X POST "https://app.esignbase.com/api/document" \
  -H "Authorization: Bearer <YOUR_ACCESS_TOKEN>" \
  -H "Content-Type: application/json" \
  -d '{
    "name": "Employee Contract",
    "template_id": "<YOUR_TEMPLATE_ID>",
    "recipients": [
      {
        "email": "signer@example.com",
        "first_name": "Jane",
        "last_name": "Doe",
        "role_name": "signee_1",
        "locale": "en"
      }
    ],
    "user_defined_metadata": {
      "internal_id": "42",
      "purpose": "contract-signing-test"
    },
    "expiration_date": "2026-03-15T23:59:00+00:00"
  }'
What Happens Next
A successful request returns a JSON response with the new document_id and its initial status, typically “DRAFT”:
{
  "document_id": "new_doc_id",
  "status": "DRAFT"
}
At this point:
- The document exists and is ready
- eSignBase will send signing emails automatically to recipients
- You can use other endpoints to query status or download the final signed PDF once complete
Notes & Tips
- Locale support: The locale for each recipient determines the language used in notifications. Supported codes include en, de, and es.
- Expiration: Documents with an expiration_date that passes before completion will automatically transition to VOIDED.
- Metadata: Use user_defined_metadata to attach internal business identifiers or tracking values.
Your next steps typically include:
- Checking the document status (using GET /api/document/
) - Handling webhooks for completion notifications
- Downloading the signed PDF once available